QR code payment for Shopify: How it simplifies the ordering process
Paying by advance payment has never been this easy for your customers. Scan the QR code, approve the payment, and you're done. Even PayPal would feel the pressure. Add this convenience to your ordering process too.

Raphael Stolz
Managing Director
Reading time: 10 minutes

Let AI summarize the post
With instant payment methods like PayPal and others, your customers can pay completely effortlessly. If only there were also a way for bank transfers to make the payment process just as smooth.
You already guessed it, there is: it is called QR code payment. Scan the QR code with your smartphone, log in to your bank, and pay.
In this article I will show you how a QR payment code works and what its advantages are, and how you can set this up yourself in your Shopify store using Cleero.
Advantages of a payment QR code
User-friendly experience for the customer: The customer can simply pay via QR code scan.
Quick receipt of funds: Through the simple payment process, the money often reaches the merchant faster.
Hassle-free payment reconciliation: Through automatic payment via a QR code, no errors occur in the transfer. The amount, IBAN, recipient details, payment reference, or purpose are fixed in advance. This leads to hassle-free payment reconciliation and smooth order processing.
Smooth order processing: Because payment reconciliation is error-free, the order is automatically marked as paid without delays and can be processed immediately.
How does payment via QR code work?
The customer selects prepayment or bank transfer in checkout and sees a QR code at the end of the order process.
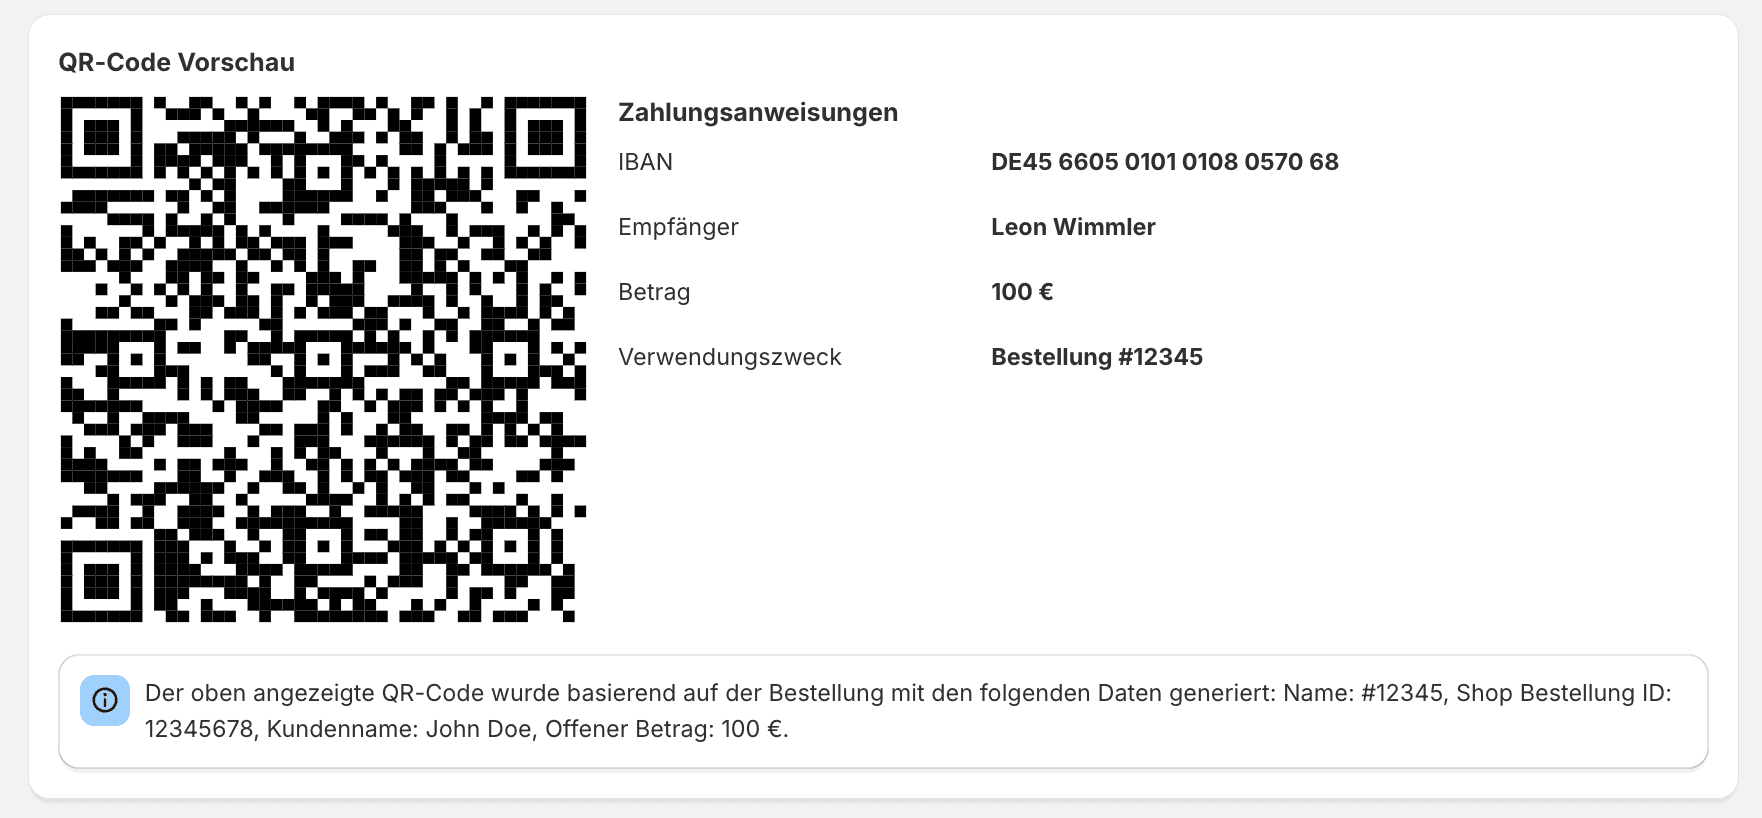
Behind this QR code are the transfer settings such as recipient, transfer amount, and payment reference. Cleero creates these dynamically for each order.
The customer can now scan this QR code with their banking app. The payment is then created immediately and only needs to be confirmed.
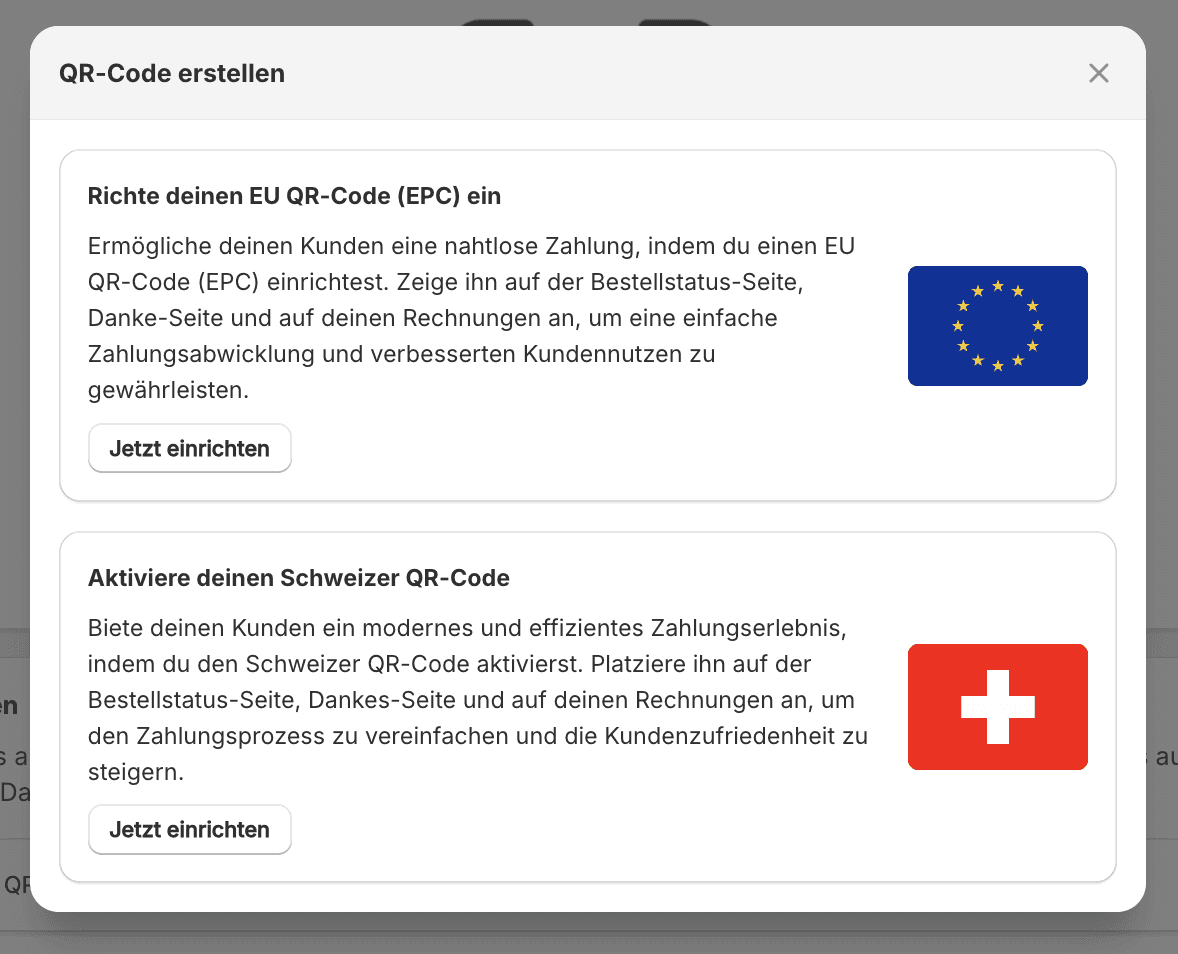
Instructions: Create a payment QR code
Requirement: Cleero installed
In the app, you will find the QR Codes section in the navigation menu.
Click on "Create". Here you have the option to offer a QR code for the EU (EPC) and one for Switzerland. Both have different formats, so two different ones are needed. A logic rule will then show them only to customers from the corresponding countries.
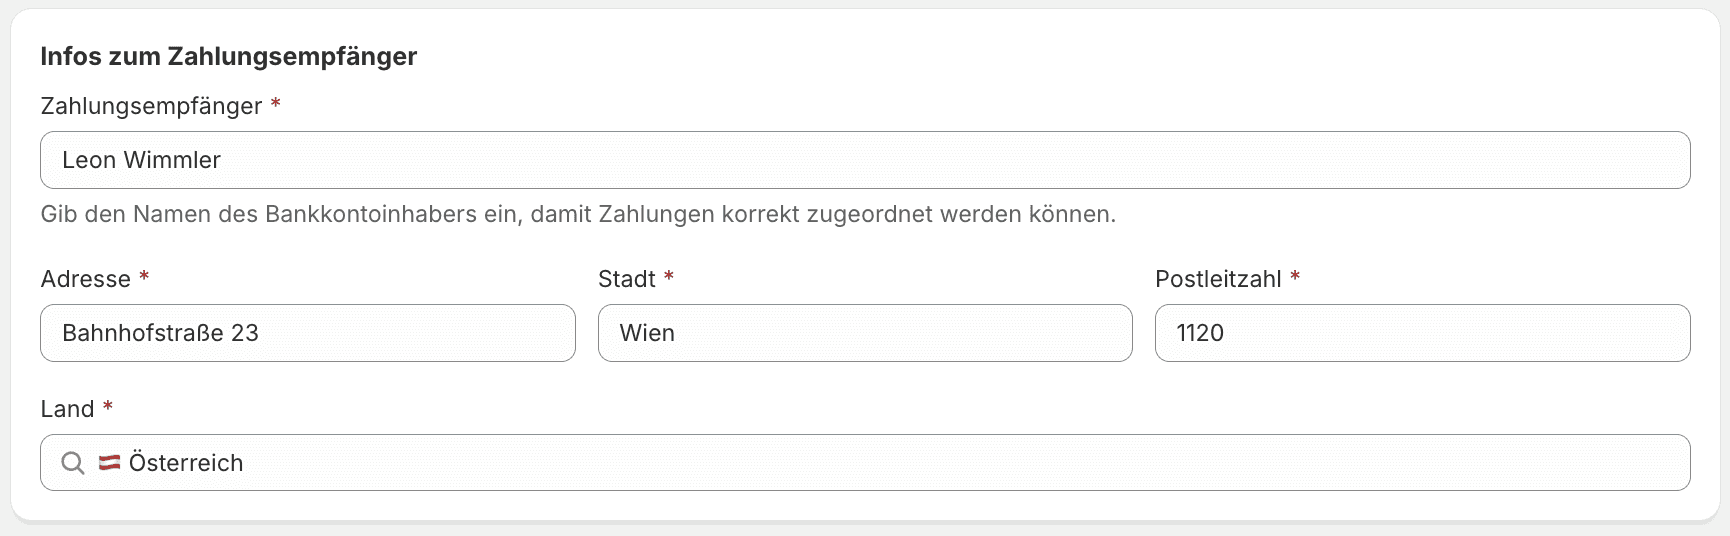
Recipient
Enter the recipient's details.
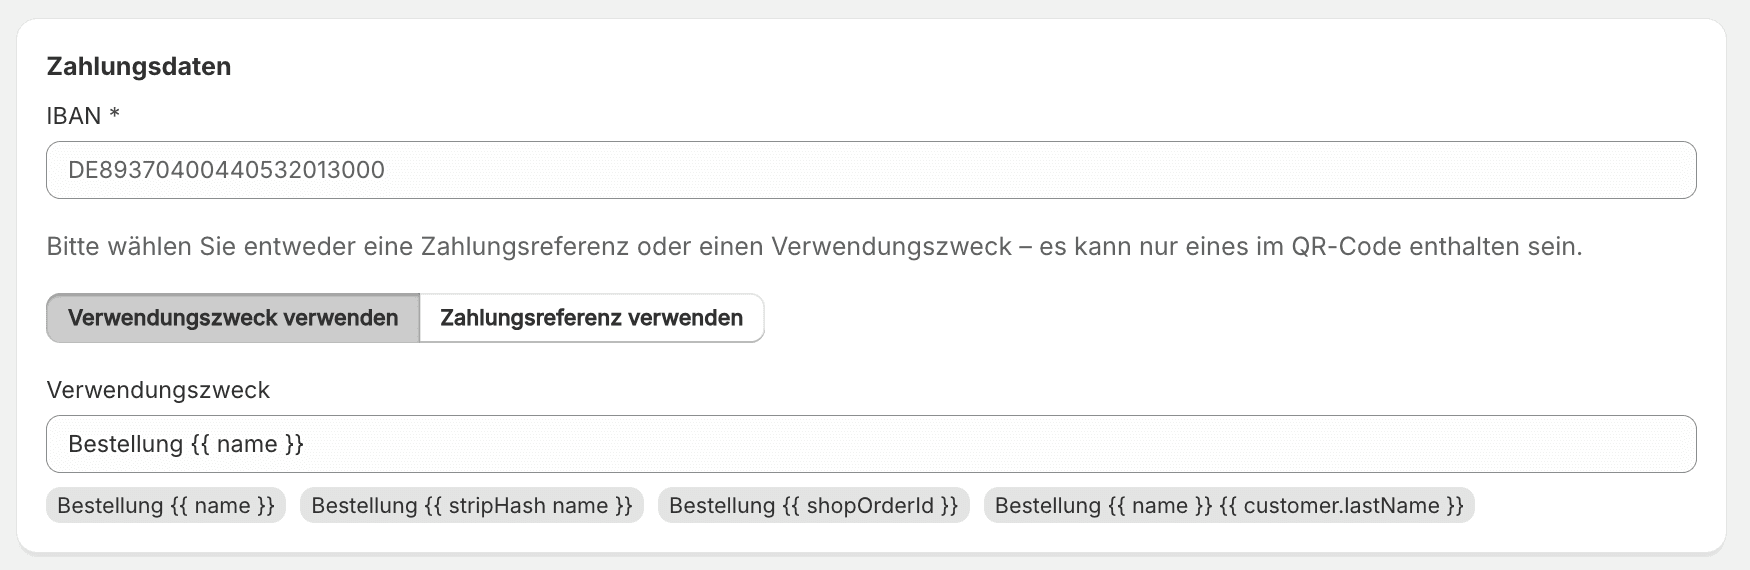
Specify payment details
Here you enter the recipient's IBAN. You also determine what the payment reference in the transfer via QR code should be. This is especially important for error-free payment reconciliation. Cleero always matches the order number, e.g. #20199, so you should always use this in the payment reference.
What the variables mean
{{ name }} stands for the order number e.g. #20199. (Recommended!)
{{ stripHash name }} stands for the order number without “#” e.g. 20199
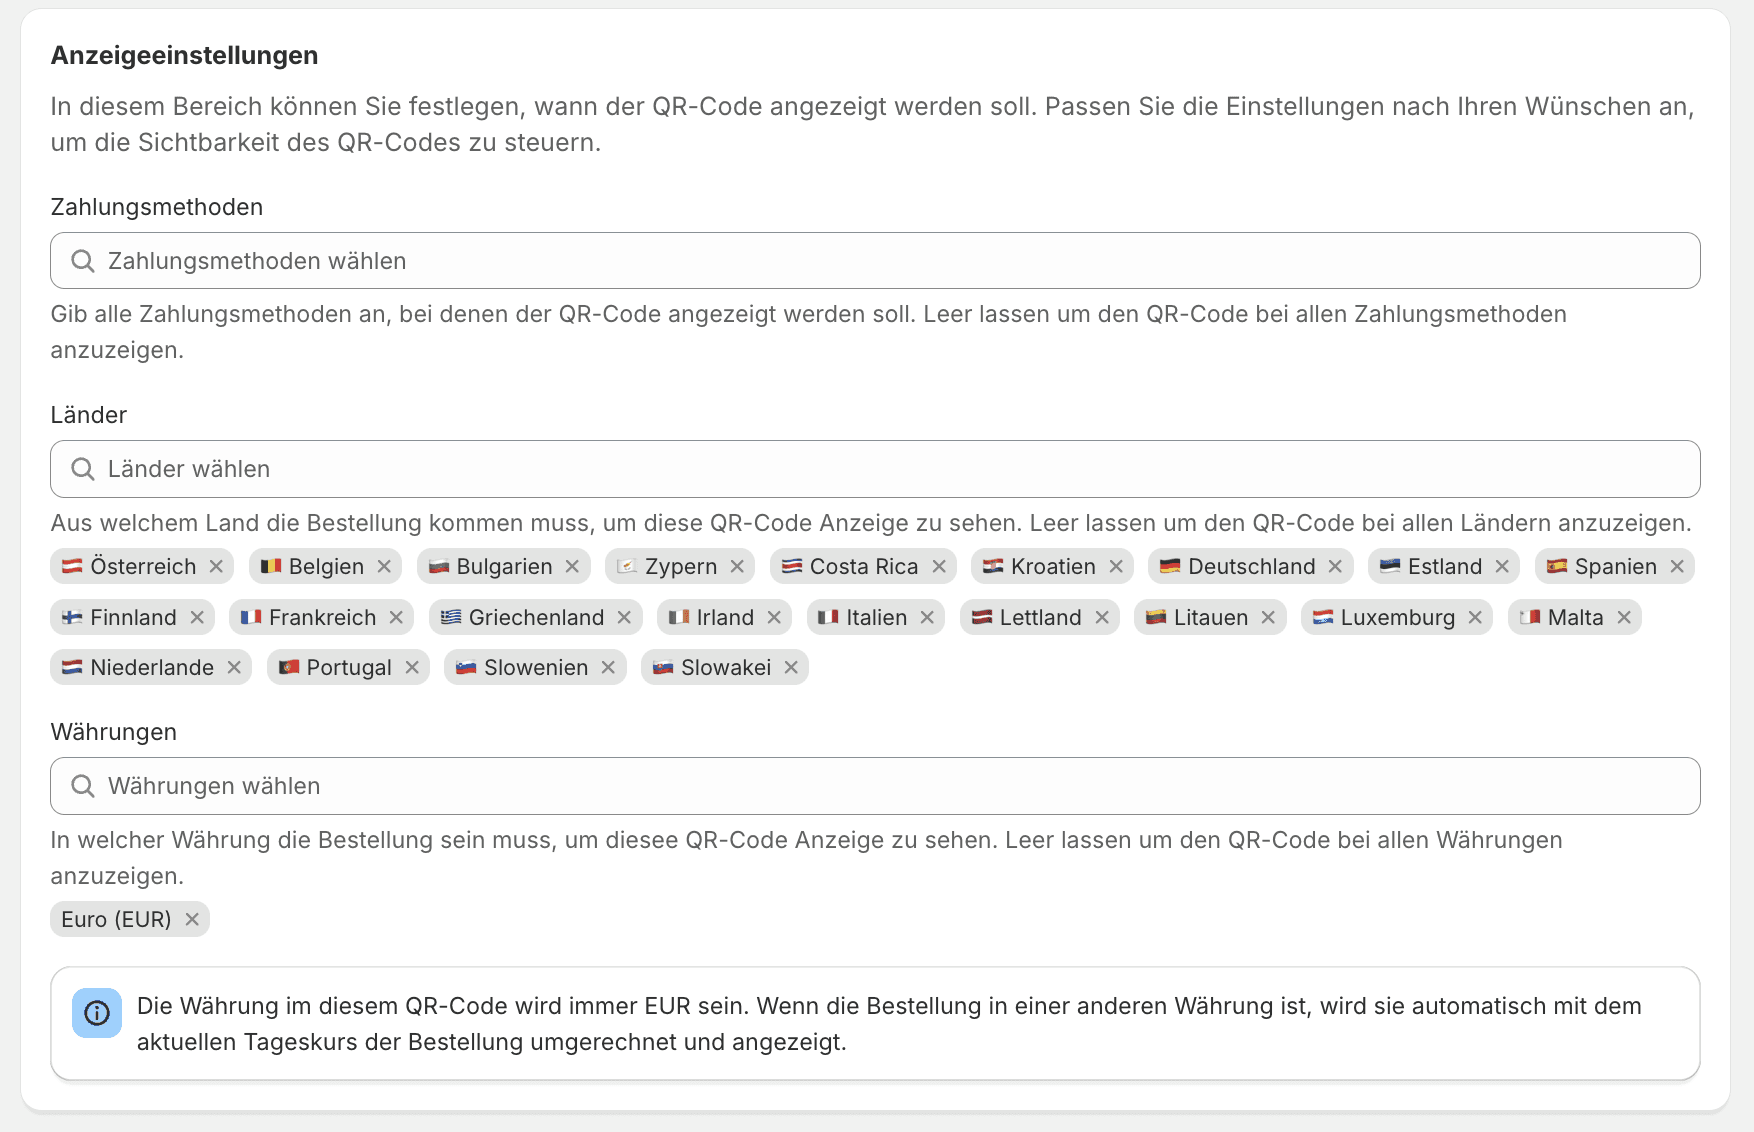
Set display settings
Choose when the QR code should be displayed. You can the display based on payment method, countries and currencies restrict.
Preview
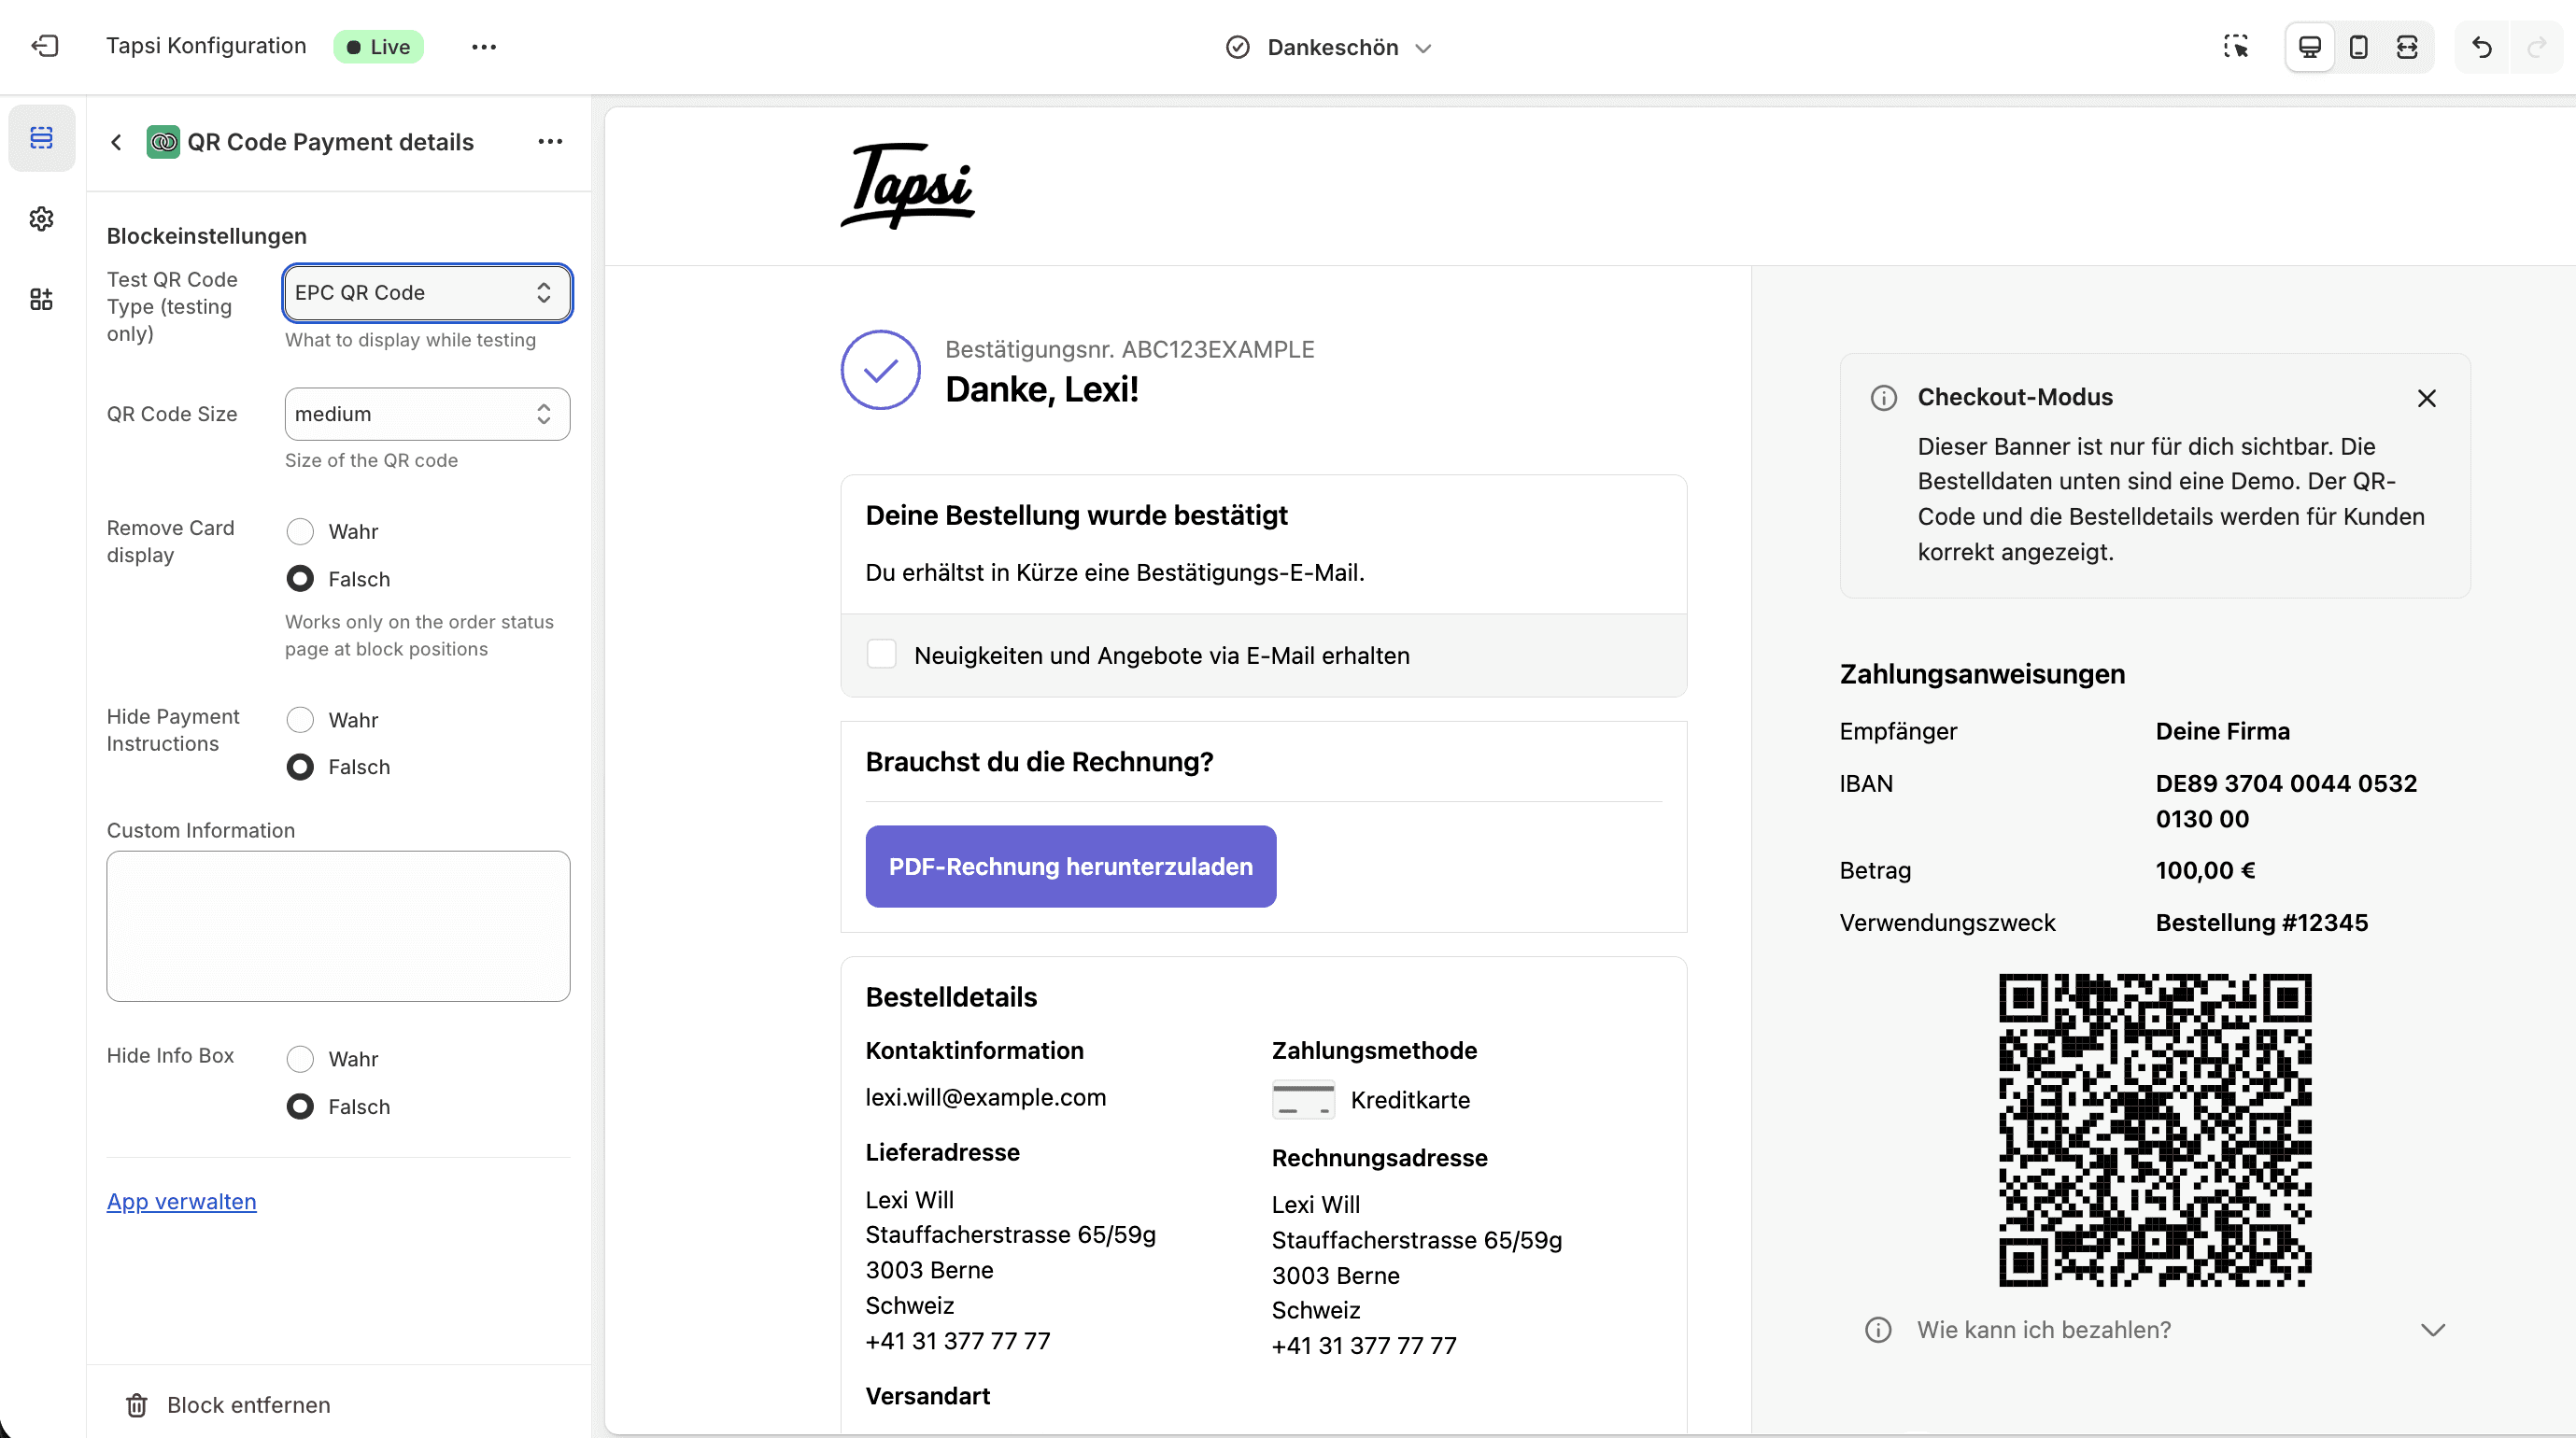
Once you have saved your settings, you will see the preview of the QR code for the thank-you page or order status page at the bottom, as well as the QR payment block for inserting into invoices.
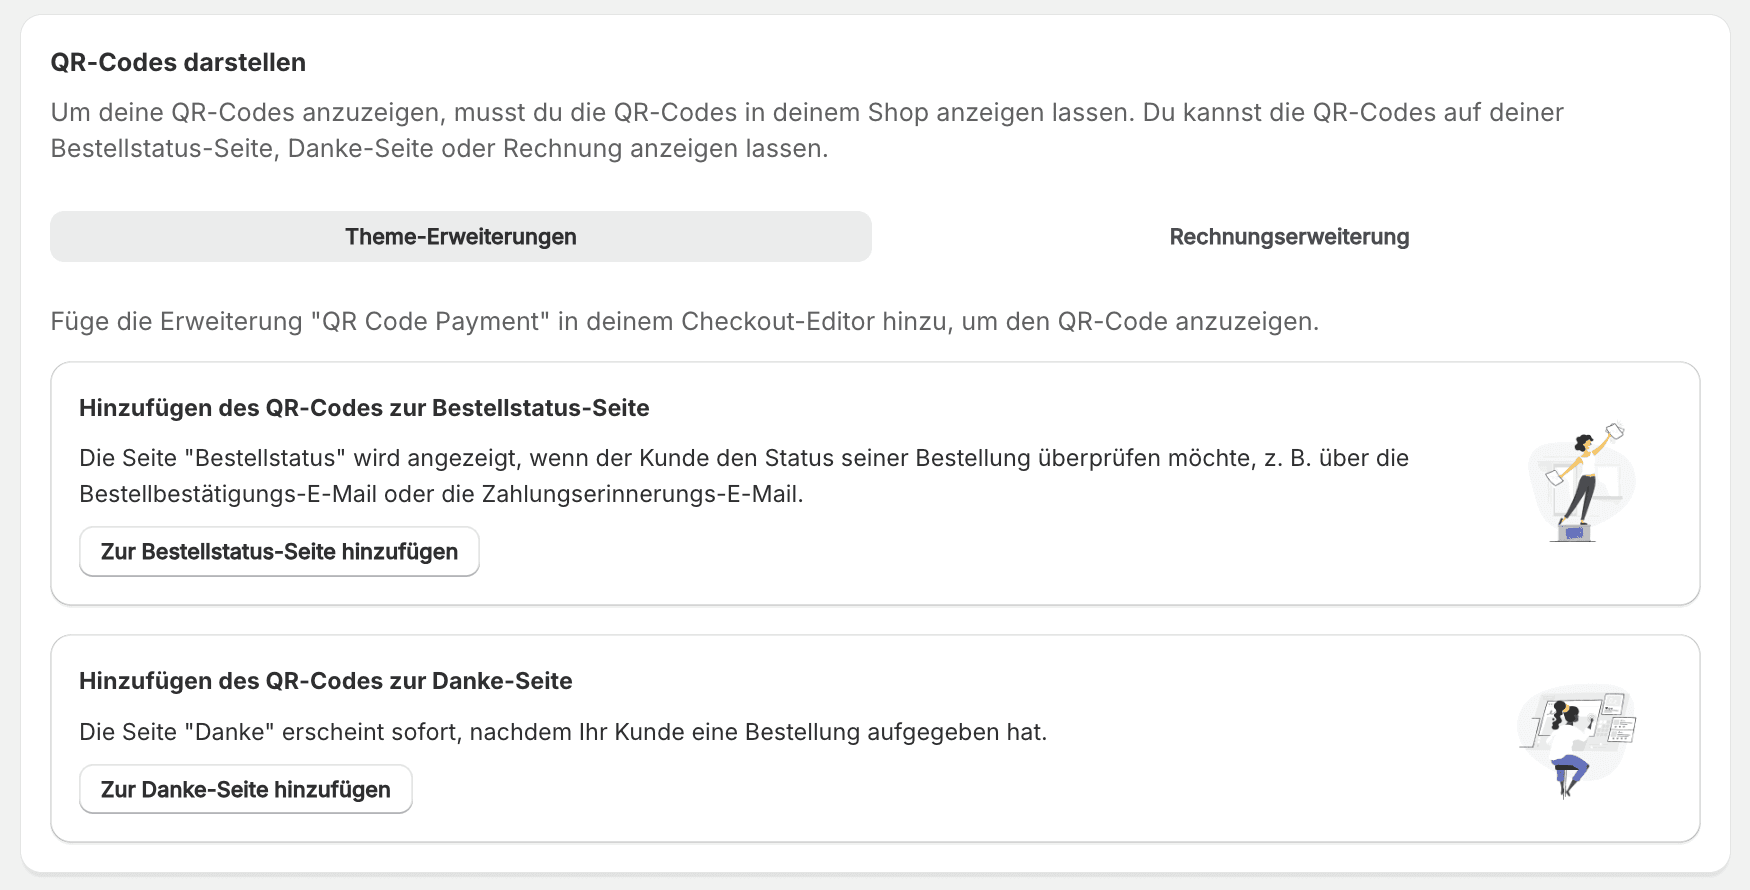
Displaying your created QR code
In the next step, I will show you how to display the QR code you just created on the order status page, the thank-you page, or on the invoice.
Add to the order status and thank-you page
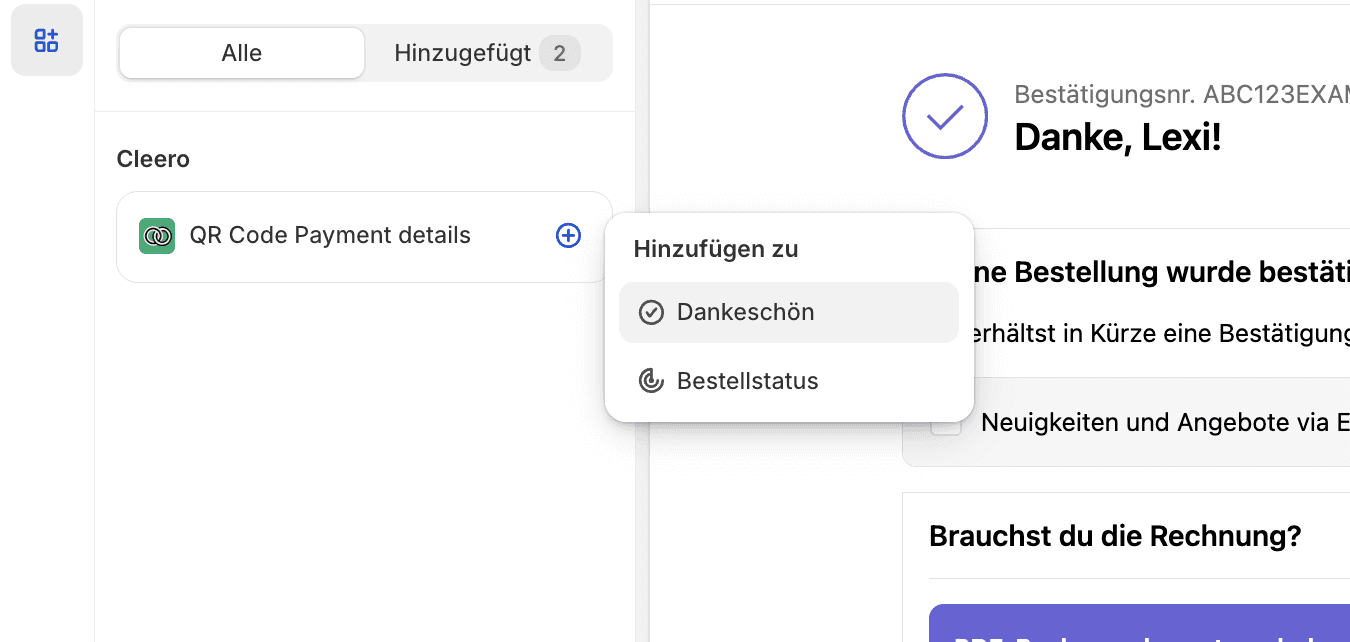
Back on the main page of the QR code settings, you will find the "Display QR Codes" section. Here you can display the QR code on the order status page and the thank-you page using a theme extension.
Simply click one of the two buttons "Add to order status page" or "Add to thank-you page".
This takes you to the respective view. In my case, it is the thank-you page.
Now you can search for Cleero and find our QR code theme extension.
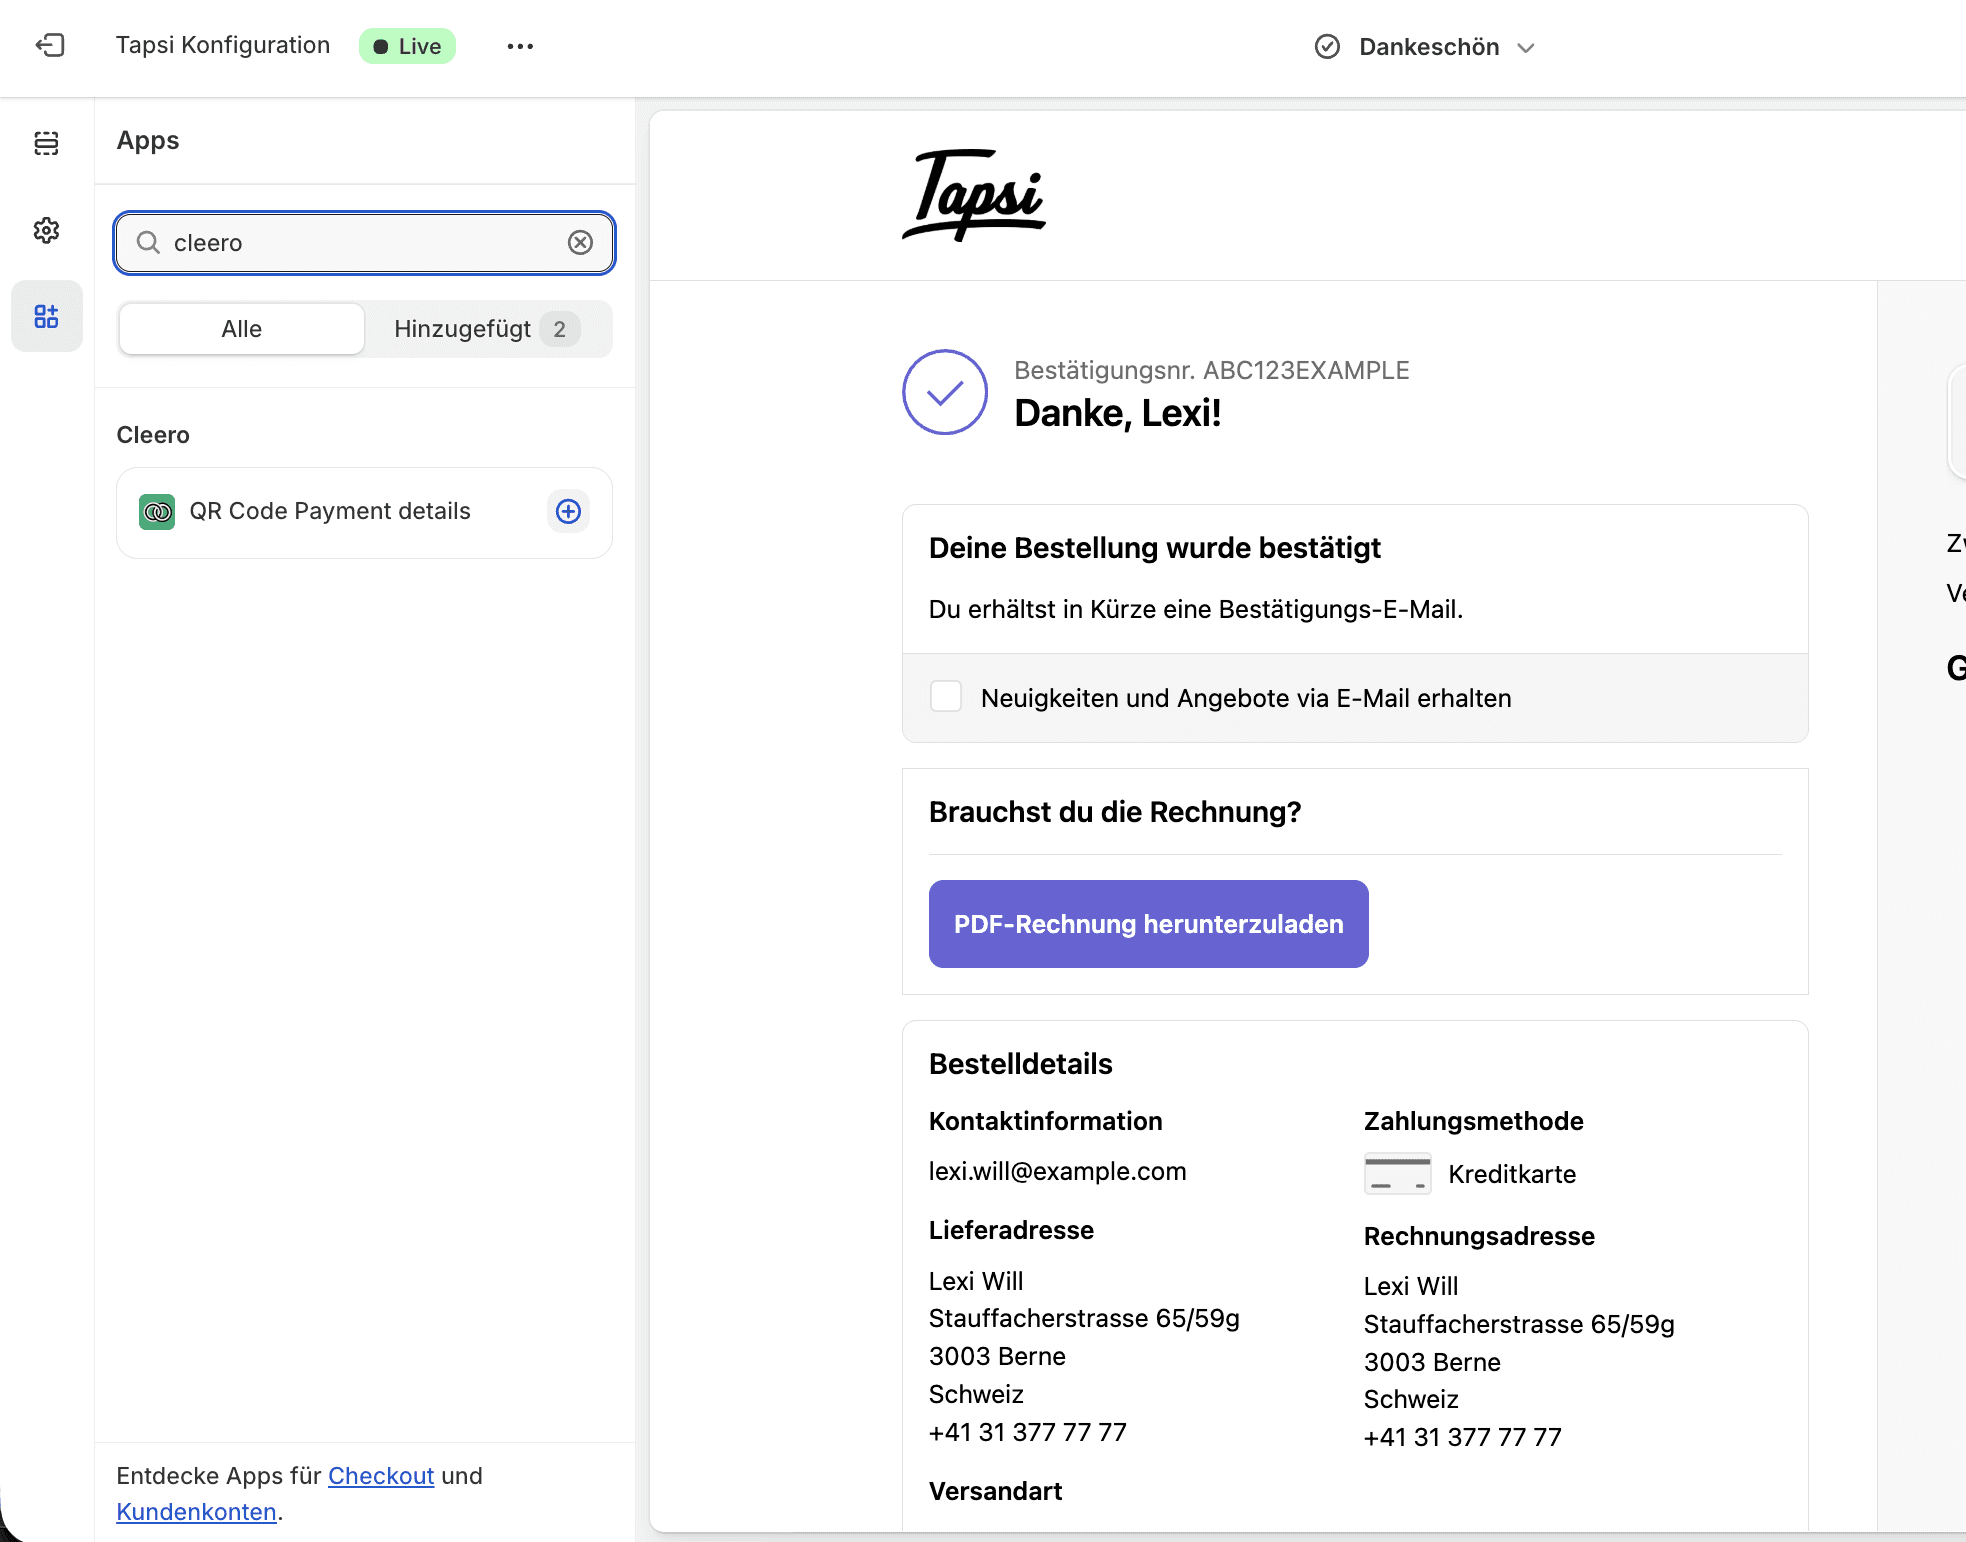
Using the plus, you now add it to the corresponding page.
QR code display settings
Now adjust the settings.
QR code size
Show/hide payment instructions
Show/hide info box
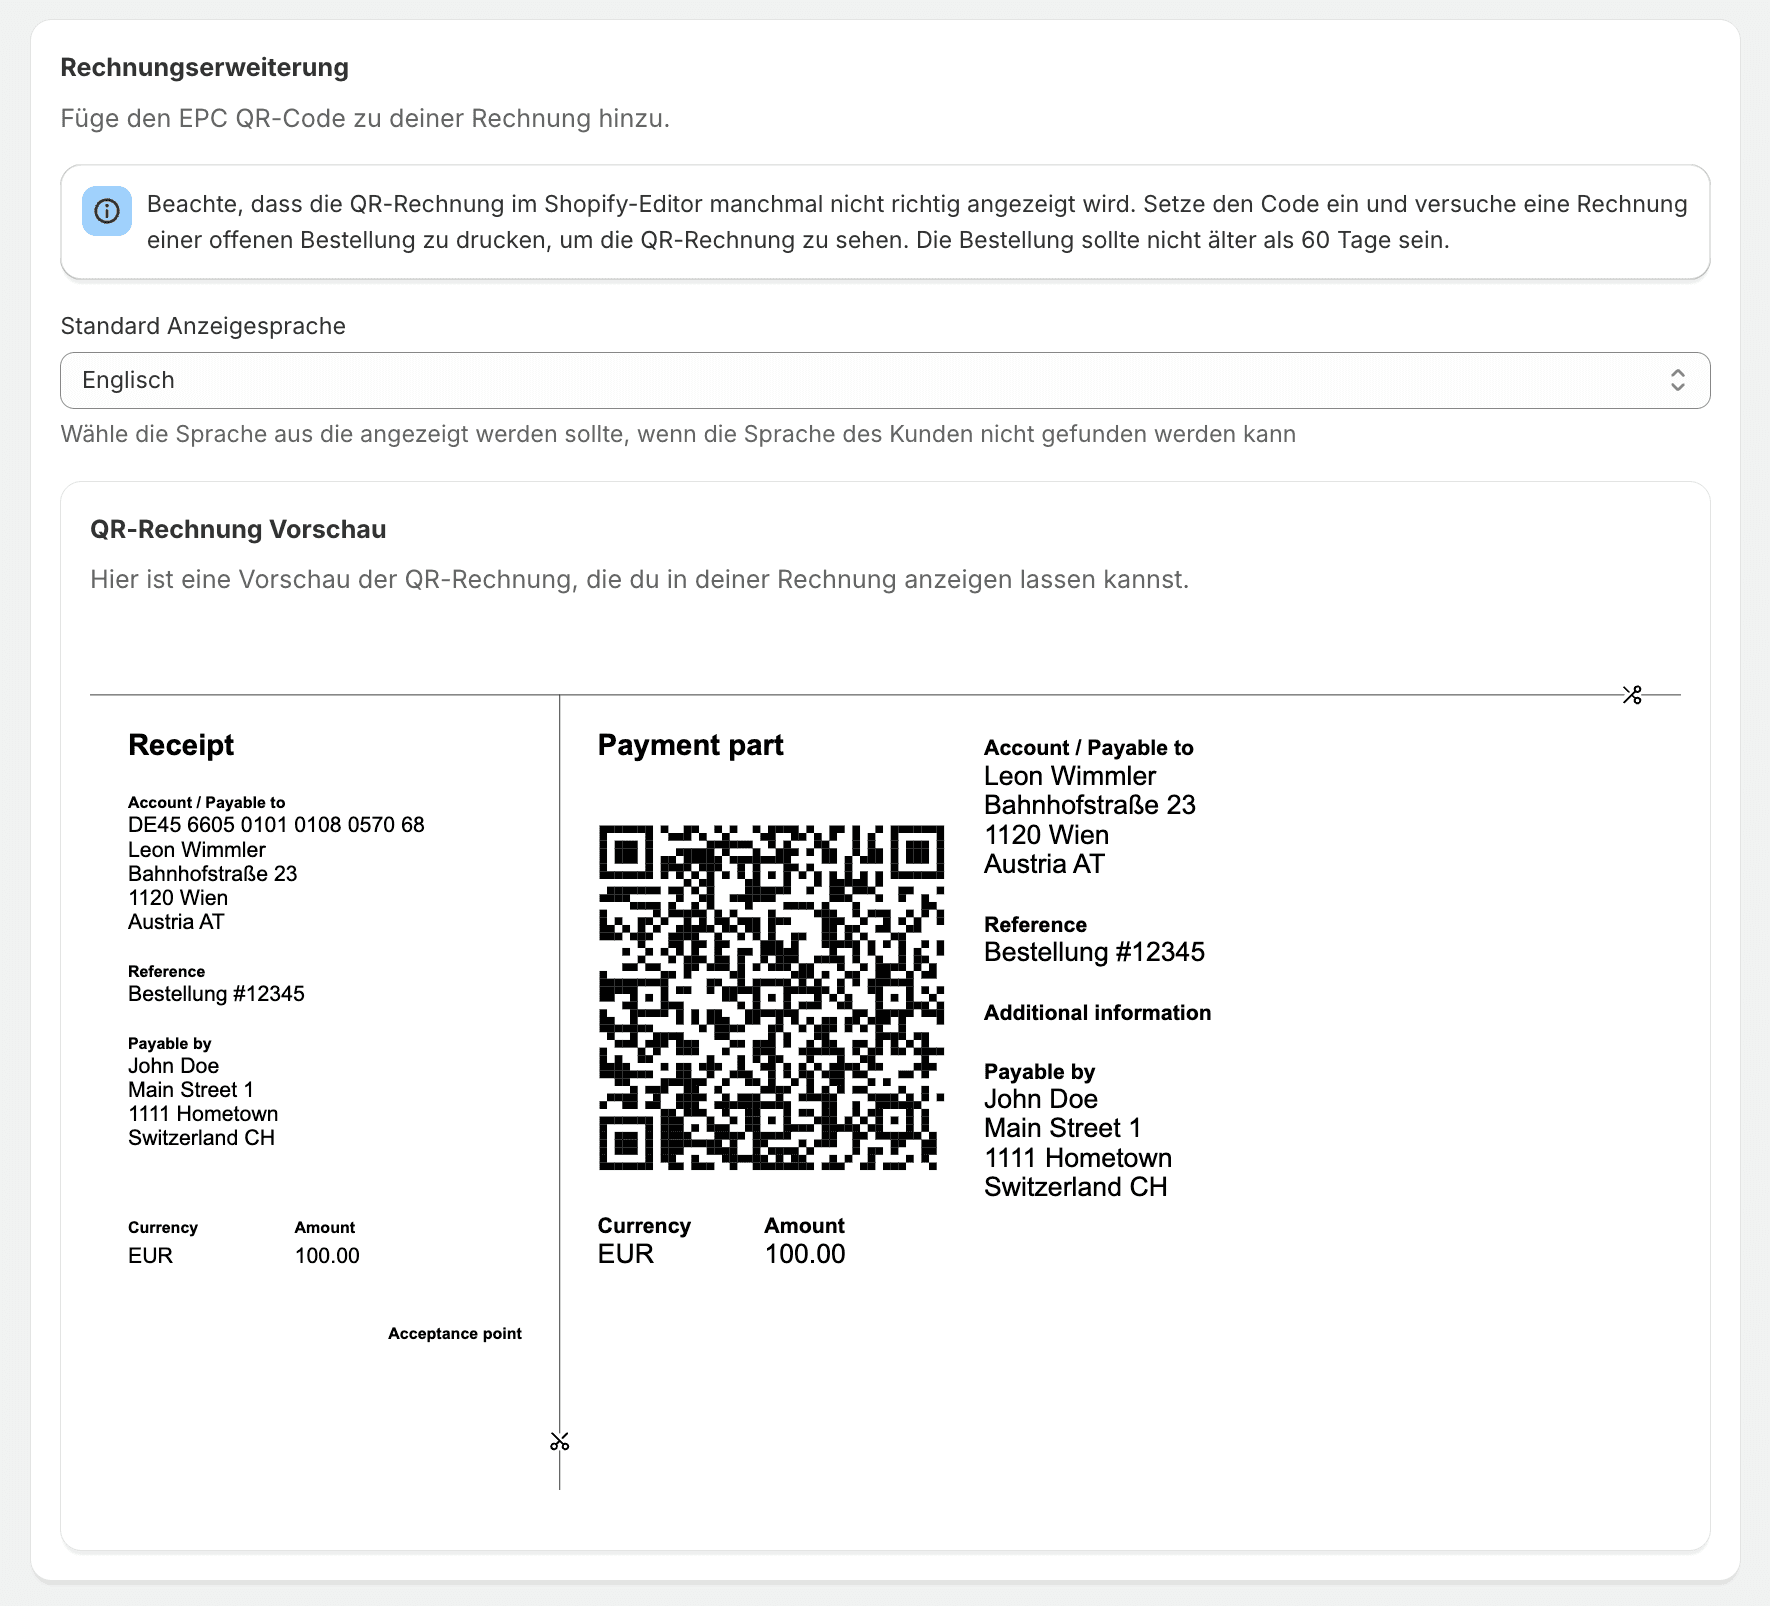
Add QR payment block to invoice
To display the QR payment block in your invoice, you simply need to copy the code and insert it at the desired location in your invoice. We are happy to support you with this step. Feel free to contact us directly via chat in Cleero or via the contact form.

FAQ:
Can I use only the QR code function in Cleero without payment reconciliation?
Yes, that is possible, but you would need to contact us briefly. Then we can offer you a fair price.
Does the QR code also work in other languages?
Of course, the QR code uses the customer's language. If no language is found, the QR code will be displayed in the desired “fallback” language. This can be specified in the settings.
Does the customer need to install a special app to pay via QR code?
No. The QR code is scanned directly with the customer's existing banking app. The only requirement is that the bank supports QR code payments, which is the case for most banks in the DACH region.
Is a QR code payment just as secure as a regular bank transfer?
Yes. The payment is made entirely within the customer's banking app. No sensitive data is transmitted to third parties, and the customer confirms the transfer like any other bank payment.
Why does the money often arrive faster with QR code payments?
Because the payment process is simpler, customers often pay directly after checkout. In addition, corrections due to incorrect payment references are eliminated, which speeds up processing.
What makes QR code payments particularly interesting for Shopify stores?
Shopify stores benefit from fewer abandoned payments, faster receipt of payments, and significantly simplified payment reconciliation. Especially with prepayment, the process is brought much closer to instant payment methods.
Share on social media